
When you book a colorbond fencing installation in Adelaide, the colour you choose is only part of the story. The real test happens on install day, when string lines are set, holes are dug, concrete is poured and every panel, rail, capping and gate is fitted. Get those steps right and your fence has a much better chance of standing straight and lasting for years. Get them wrong and small shortcuts can show up later.
This behind-the-fence walkthrough explains what a professional install should look like from start to finish. You will learn why install day details decide long-term performance, what to check before the first hole is dug, how to confirm delivered panels and posts, how set-out and string lines work, and what correct post-hole depth and concreting involve. We also cover panel, rail and capping fitting, gate hanging, site clean-up, the handover walk-through, and what to do before and after install day. By the end, you will know what you are paying for and what to inspect before the installer drives off.
Why the Details of Install Day Decide How Your Fence Performs
Choosing a colour is the easy part. The set-out, hole depth, concrete and fixings are what keep your fence straight, plumb and quiet for years.
A typical Adelaide install day runs in a predictable order: pre-start checks, delivery inspection, set-out and string lines, post holes, concrete, panels and rails, capping, gate, clean-up, then handover. You can follow the full sequence in What to Expect: Site Prep Through to Completion.
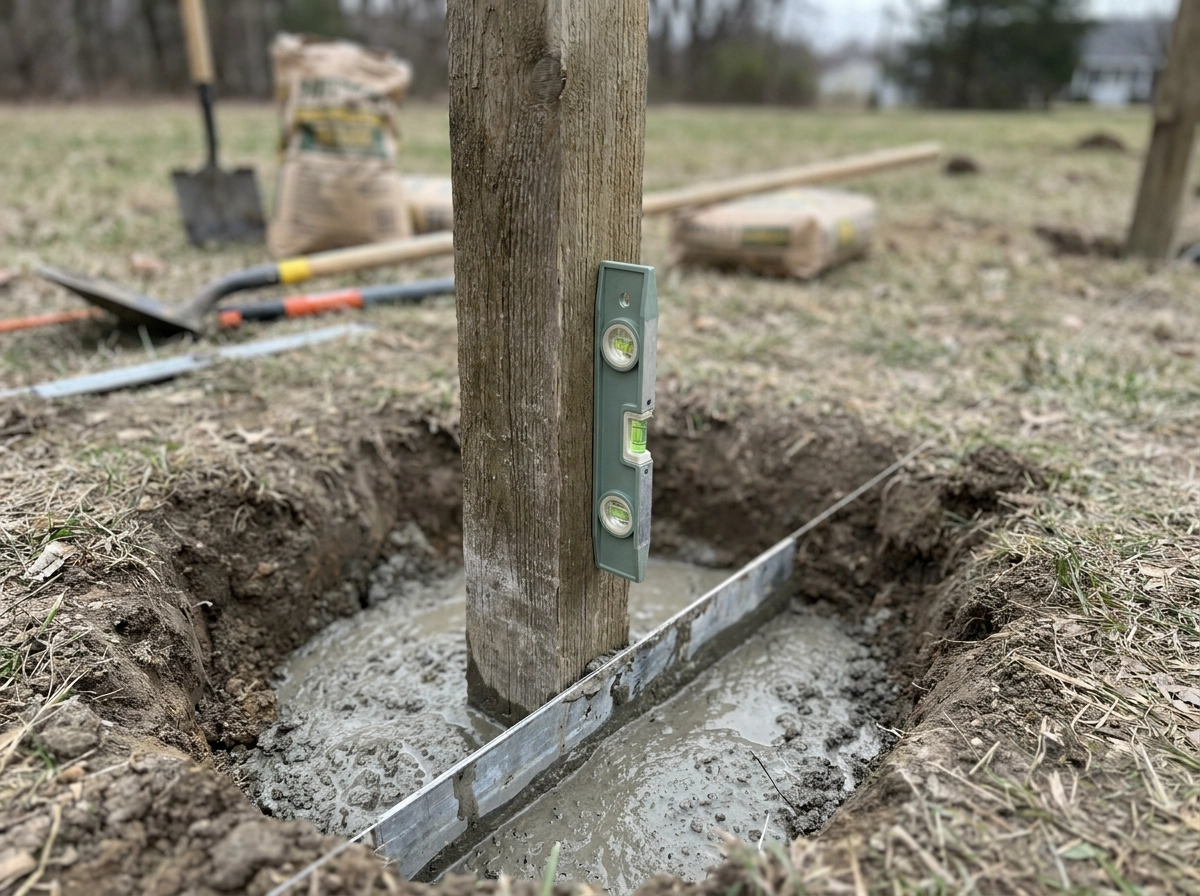
Straightness comes from measuring, checking and bracing, not speed or luck. Each post should be set to the string line and checked with a level before concrete goes in.
One limit matters early: the manufacturer’s installation guide covers fences up to 1.8 m, so anything taller needs supplier advice before work begins.
Treat this guide as an inspection checklist for the day, not a DIY manual. Watch the work, ask questions and raise concerns before the crew packs up.
Before the First Hole: Boundary, Services and Site Checks
Before any digging, settle three things: where the fence goes, what is underground and what the rules allow.
Check the proposed line against your title plan or a survey. Boundary fences between adjoining properties are jointly owned by both owners, so if the fence sits on a shared boundary, talk to your neighbour early. South Australia’s Fences Act requires written notice of intention before fencing work begins.
Ring Dial Before You Dig on 1100 before anyone lifts a shovel, to locate underground electricity, gas, water and communications lines. Check with your local council on boundary fence requirements, height limits and pool fencing rules before digging starts. The same rules apply if you are weighing up raising an existing Colorbond fence instead of replacing it. Fences near severe marine conditions or bounding a swimming pool need specific advice from your installer and the relevant authority before work begins.
Wind region and exposure (open ground versus surrounding buildings or vegetation), soil type and slope all shape the posts, footings and bracing. Ask your installer how each was assessed for your block.
Finally, confirm the fence height in writing.
Delivery Day: Checking Your Colorbond Fencing Panels and Posts
With pre-start checks complete, the next event is delivery. Before unloading, count the load against your order: posts, bottom and top rails, sheets, capping, gate frame, brackets and fasteners. Ask your installer to walk through it with you, as part of our Colorbond fencing services.
If you spot dents, kinks or scuffed coating on delivery, flag them to your installer before the pieces go up.
Ask how the steel is confirmed as genuine COLORBOND steel. Not all pre-painted coloured steel fencing on the market is the same product, and documentation can be requested if you want it in writing.
Check the colour and finish against your sample or order confirmation, and confirm sheets and capping share the same profile.
If work is not starting that day, store panels and posts flat and supported off the ground, so they do not twist or mark.
Once the materials pass inspection, the crew moves on to set-out and string lines.
Set-Out and String Lines: Getting the Fence in the Right Place
With the delivery counted and inspected, set-out comes next. Marker pegs mark each post centre at bottom rail length plus 10 mm, typically 2350 to 2365 mm depending on the rail profile. A string line then runs the full length of the fence so every Colorbond post finishes on the same line; confirm it sits on the agreed boundary before any digging starts.
Corners, returns and gate openings are pegged first, then the intermediate posts are spaced evenly between them.
On sloping ground, ask whether the fence will be raked or stepped. Raking generally looks better and performs better than stepped panels. Where the slope is steeper than about 1 in 8, sheets may need vertical slitting and post heights increase, so ask how your slope has been allowed for.
This is your best chance to speak up. Once holes are dug and concreted, moving the line costs time and money.
Digging and Concreting the Post Holes
With the line set, the crew digs each hole. Post hole diameter is not fixed: it comes from a depth chart that factors in fence height, wind region and soil type. Ask your installer what depth and diameter apply to your block. Depth is where most future problems begin. Embedment depth and soil resistance govern lateral stability, and shallow holes in poor ground are a common reason posts lean over time, ask your installer what depth applies to your soil.
Soil type also determines how much concrete is needed, so the mix and volume should be matched to your ground rather than guessed. Watch that the post is held plumb and on the string line while concrete goes in. Ask the installer when they plan to fit rails and sheets, rushing that step before the concrete has set is a known shortcut.
Watch for consistency: every hole the same depth, every post checked with a level, and no post left loose in dry mix. Once those posts are set and cured, the panels, rails and capping can go on.
Fitting Panels, Rails and Capping
Once the concrete has cured, the framing and sheets go on in a set order. The bottom rail is fitted first, seated into the brackets on each post so it sits level along the run.
Sheets, top rail and capping
Sheets are then positioned between the posts, followed by the top rail fitted over them and locked into the brackets. Each sheet should sit square, with consistent laps, no gaps at the posts and no buckling along the run. Capping is fitted along the top to finish the fence and stop water sitting in the sheet profile.
Stand back and check the line for straightness and an even top height, including through corners and anywhere the fence steps or rakes down a slope. Any cut sheets at ends, corners or gate openings, including around a pool boundary where the pool fence compliance rules in Adelaide apply, should be de-burred and touched up so the exposed edge is protected.
If you spot a wavy run or a sheet sitting proud, raise it with the crew while they are still on site. Once the ute is packed, fixing it becomes a return visit.
Next, the gate goes on.
Hanging the Gate So It Swings True
The final sheet is capped and the run is straight, but the gate is the one part of a Colorbond fence that moves every day. Gate posts take daily stress, so check that they feel solid and don’t rock when the gate is swung hard.
Test the gate yourself. It should open and close smoothly, latch without lifting or dragging, and clear the ground across its full swing. Check that hinges look evenly placed and the gate frame sits square in the opening.
Where a fence bounds a pool, gate hardware is a compliance matter rather than a preference: gates must self-close from any position and self-latch, with the latch out of reach of small children. Your installer and council can confirm the full specification for your property.
Before the crew packs up, ask for the gate to be tested in front of you, including the latch, any drop bolts and the gap at the base.
Clean-Up: What Should Be Gone Before the Ute Leaves
Once the gate swings true, the last job is the clean-up, and it is worth watching. Offcuts, packaging, empty concrete bags and spoil should leave with the crew, not disappear into the ground along the fence line. Ask where excess soil or concrete is going: spread on site, carted away, or left exactly where you agreed. Garden beds and lawn disturbed during digging should be tidied before the ute pulls out.
Walk the line and look for concrete splatter on new Colorbond fencing panels, posts and paving, plus footprints or tyre marks through wet ground. A hose-down while the concrete is still fresh beats chipping it off later.
Confirm the fate of leftover sheets, rails and fixings. Some installers leave spare sheets and touch-up paint with you; others take them back. Get a clear answer either way.
Finally, ask who to contact if something rattles, shifts or needs adjustment in the coming weeks, and note that name and number before you pay.
The Handover Walk-Through: Your Pre-Departure Checklist
Once the site is tidy, your final job is a slow walk along the fence line before the balance is paid. Use this checklist.
Line and level: Stand back and sight along the run. The fence should be straight, the top even, posts plumb, and no sheets buckled or sitting proud of the line.
Fixings: Every bracket, screw and rivet should be present and tight. Capping seated and clipped down. Cut edges de-burred and touched up.
Gate: Swing it yourself. It should open freely, latch first time, clear the ground across its full arc, and have hardware firmly fixed.
Site clean: Confirmed in the clean-up step above.
Paperwork: Before paying the balance, get written confirmation of fence height, materials used, warranty terms and maintenance advice. Photograph anything you are unsure about, and ask questions now rather than later.
Tick these off, and you can pay with confidence.
What to Do Before and After Install Day
Before install day, start weeks ahead. Check the boundary and underground services early (covered above), and confirm written neighbour consent (fencing law in South Australia). Ask your installer, in writing, about fence height, soil type, wind exposure and the depth chart they are working to.
On the day, watch the set-out and string line, spot-check hole depth and concrete, and speak up early if a post looks out of line. That is far cheaper than fixing it later.
Before handover, walk the full fence line, test the gate yourself and confirm the site is clean. Then ask for warranty details and the final scope in writing, and take a few photos of the finished fence for your records.
Conclusion
A strong Colorbond fence install in Adelaide comes down to the details you check before, during and after the job. Do the checks, ask the right questions, and enjoy a fence that looks right and performs for years.